Easy nutritious snack bars you can prep for busy days.
Nutritious Snack Bars You Can Make Ahead for Busy Days: Your Ultimate Guide
Let’s face it: when life gets hectic, healthy eating often takes a backseat. You grab whatever is convenient—often something processed, sugary, and leaving you crashing by 3 PM. But what if I told you that having truly nutritious snack bars ready in minutes is not only possible but easier than buying store-bought versions? In this guide, you'll discover how to make ahead snack bars packed with real food ingredients that fuel your body without the junk. No more deciphering confusing labels or paying premium prices for bars that taste like cardboard. Let’s transform your snack game for good.
What Makes a Snack Bar Actually Nutritious?
Before we dive into recipes, let’s clear up one major misconception: not all "healthy" snack bars deserve that title. Many store-bought options are basically candy bars in disguise, loaded with refined sugars and artificial ingredients. According to research, the healthiest bars are primarily made from unprocessed foods like whole grains, nuts, seeds, and dried fruit. Here’s what to look for in truly nutritious snack bars:
- Protein power: Aim for 5-10 grams per bar to keep you full and satisfied.
- Fiber focus: At least 3 grams per serving helps stabilize blood sugar.
- Smart sweeteners: Opt for natural options like dates, maple syrup, or coconut nectar instead of refined sugars.
- Healthy fats: Ingredients like nuts and seeds support brain function and enhance satiety.
- Minimal processing: Choose recognizable ingredients you'd find in your own pantry.
Amy Keating, a registered dietitian, emphasizes: "Look for bars made mostly from unprocessed foods, such as whole grains, nuts, seeds, and dried fruit." These ingredients provide sustained energy without causing the blood sugar rollercoaster to derail your day.
Why Homemade Beats Store-Bought Every Time
You might wonder: "Why bother making my own when I can just grab one at the store?" Here’s why creating your own nutritious snack bars is worth the minimal effort:
- Cost savings: Store-bought "healthy" bars often cost $2-$4 each. Homemade versions cost about 50-75 cents per bar.
- Ingredient control: No mystery additives, artificial sweeteners, or hidden sugars.
- Customization: Tailor recipes to your dietary needs (gluten-free, nut-free, vegan).
- Freshness: Without preservatives, your bars taste better and retain more nutrients.
- Environmental impact: Making them at home reduces packaging waste compared to individually wrapped store bars.
As highlighted by various nutrition blogs, making your own snacks helps you understand exactly what you’re consuming. It’s about whole foods—oats, nuts, and seeds—without any additives or preservatives that you can’t pronounce.
Essential Ingredients for Truly Nutritious Snack Bars
Building the perfect snack bar is like crafting a nutritional symphony—each ingredient plays a specific role. Here’s your shopping list for success:
The Foundation: Base Ingredients
- Oats: Rolled or quick oats are an excellent source of fiber and complex carbohydrates. Choose certified gluten-free if necessary.
- Nuts & Seeds: Almonds, walnuts, pecans, pumpkin seeds, and sunflower seeds add protein and healthy fats, not to mention a satisfying crunch.
- Dried Fruit: Options like dates, raisins, or cranberries provide natural sweetness and additional fiber.
The Binders: Holding It All Together
- Nut/Seed Butters: Peanut, almond, or sunflower seed butter create that perfect chewy texture.
- Liquid Sweeteners: Pure maple syrup, honey (not for vegans), or coconut nectar work great as binders.
- Mashed Fruit: Applesauce or mashed bananas can add moisture without refined sugars.
The Boosters: Nutritional Power-Ups
- Protein Powder: Optional but beneficial for post-workout bars—plant-based varieties are available for vegan options.
- Superfoods: Consider adding chia seeds, hemp hearts, cacao nibs, or goji berries for an extra nutritional kick.
- Spices: Cinnamon, vanilla extract, or nutmeg can enhance flavor without adding calories.
Nuts and seeds are nutrient powerhouses, filled with healthy fats, protein, and fiber that keep you satisfied and focused. Their good fats support brain health, making them a perfect choice for busy days.
3 Simple Methods for Making Snack Bars
You don’t need fancy equipment or advanced culinary skills to create creamy, nutritious snack bars. Here are three foolproof approaches:
No-Bake Method (Easiest & Quickest)
This is perfect for beginners and particularly handy during hot days when you don’t want to turn on the oven. This method relies on sticky ingredients like dates, nut butters, and honey to bind everything together.
How it works:
- Process the base ingredients in a food processor until finely chopped.
- Press the mixture firmly into a lined baking pan.
- Refrigerate for 1-2 hours until set.
Best for: Nut and seed combinations, energy balls, or any date-sweetened bars.
Baked Method (Classic Texture)
This method gives you that familiar granola bar chewiness with slightly crispy edges.
How it works:
- Mix the wet and dry ingredients separately.
- Combine and press the mixture into a lined pan.
- Bake at 325°F (160°C) for 20-25 minutes.
- Allow cooling completely before cutting.
Best for: Traditional granola bars, oat-based recipes, and those looking to bake a batch.
Frozen Method (For Extra Firm Bars)
Freezing creates bars that hold up well in lunchboxes or during outdoor activities.
How it works:
- Prepare the mixture as you would for no-bake bars.
- Instead of refrigerating, freeze the bars until solid.
- Store in the freezer, thawing them for 10-15 minutes before serving.
Best for: Hot climates or if you prefer a firmer texture for your snacks.
5 Easy & Delicious Homemade Snack Bar Recipes
Ready to roll up your sleeves and get mixing? These tested recipes deliver maximum nutrition with minimal effort. All can be made in under 30 minutes and stored for quick grabs during your busiest days.
1. No-Bake Nut and Seed Power Bars
These bars are a fantastic grab-and-go option, offering 7g of protein and 4g of fiber per serving.
Ingredients:
- 1 cup mixed nuts (almonds, walnuts, pecans)
- ½ cup pumpkin seeds
- ½ cup sunflower seeds
- ¼ cup chia seeds
- ½ cup pitted dates
- ⅓ cup almond butter
- 2 tbsp coconut nectar or maple syrup
- 1 tsp vanilla extract
- Pinch of sea salt
Instructions:
- In a food processor, pulse the nuts and seeds until coarsely chopped.
- Add the dates and blend until the mixture starts clumping together.
- Transfer to a bowl and mix in the almond butter, coconut nectar, vanilla extract, and salt.
- Press the mixture firmly into an 8×8 inch pan lined with parchment paper.
- Refrigerate for 2 hours, then cut into 8 bars.
- Wrap individually in parchment paper for easy grabbing.
Pro tip: For chocolate lovers, consider adding 1-2 tbsp of cacao nibs!
2. Morning Energy Breakfast Bars
These bars are packed with supercharged nutrients for your busy mornings and boast a delicious flavor profile.
Ingredients:
- 1 cup almonds
- ½ cup pecans
- ½ cup walnuts
- ¼ cup pumpkin seeds
- ¼ cup sunflower seeds
- 2 tbsp flaxseeds
- 2 tbsp sesame seeds
- ½ cup pitted dates
- 3 tbsp almond butter
- 1 tbsp coconut nectar
- 1 tsp cinnamon
Instructions:
- Pulse the nuts and seeds in a food processor until coarsely ground.
- Add the dates and blend until the mixture forms a ball.
- Mix in the almond butter, coconut nectar, and cinnamon.
- Press the mixture into a 9×9 inch pan and chill for 2 hours before cutting into 9 bars.
These bars are packed with calcium, magnesium, zinc, and protein—making them an all-in-one meal.
3. Healthy 3-Ingredient Granola Bars
Perfect for beginners, this recipe uses only three ingredients—yes, just three!
Ingredients:
- 2 cups rolled oats
- ½ cup honey or maple syrup
- ½ cup peanut butter
Instructions:
- Mix all ingredients in a large bowl until well combined.
- Press firmly into an 8×8 inch pan.
- Refrigerate for 2 hours before cutting into 8 bars.
Variation: Add ¼ cup dark chocolate chips or dried cranberries for an extra nutritional boost.
4. Protein-Packed Peanut Butter Bars
Ideal for post-workout snacking, these bars pack 10g of protein each!
Ingredients:
- 1 cup rolled oats
- ½ cup peanut butter
- ⅓ cup honey
- ¼ cup vanilla protein powder (plant-based or whey)
- 2 tbsp chia seeds
- 2 tbsp dark chocolate chips
- 2-3 tbsp almond milk (as needed)
Instructions:
- Combine all ingredients in a bowl until well mixed (add almond milk as needed for texture).
- Press firmly into an 8×8 inch pan.
- Refrigerate for 2 hours before cutting into 8 bars.
Tip: For a nut-free version, use sunflower seed butter and pea protein powder.
5. Carrot Cake Bliss Balls
A nut-free, deliciously sweet option that can double as a dessert!
Ingredients:
- 1 cup rolled oats
- ½ cup sunflower seeds
- ¼ cup shredded carrots (squeeze out moisture)
- 2 tbsp raisins
- 2 tbsp coconut flakes
- 2 tbsp almond butter or sunflower seed butter
- 1 tbsp honey
- 1 tsp cinnamon
- ½ tsp nutmeg
Instructions:
- Process all ingredients in a food processor until sticky and well combined.
- Roll into 12 balls.
- Refrigerate for 1 hour before storing in an airtight container.
These bliss balls are excellent for satisfying sweet cravings while ensuring you’re getting quality nutrition.
Pro Tips for Perfect Snack Bars Every Time
Even if you have the best recipes, a few insider tricks will elevate your homemade snack bars from good to amazing:
Texture Troubleshooting
- Too crumbly? Add more nut butter or liquid sweetener (1 tbsp at a time).
- Too sticky? Incorporate more oats or nuts (1-2 tbsp at a time).
- Want chewier bars? Reduce baking time or increase the amount of dates.
- Prefer crunchier bars? Increase baking time slightly or reduce the amount of wet ingredients.
Storage Secrets
- Refrigerator: Store in an airtight container for up to 2 weeks.
- Freezer: Wrap individually and freeze for up to 3 months (thaw for 10-15 minutes).
- On-the-go: Use small containers or wrap in parchment paper.
Customization Ideas
- For kids: Make mini-bars or fun shapes.
- Seasonal twists: Add pumpkin spice in fall or citrus zest in winter.
- Dietary needs: Adjust ingredients for gluten-free, vegan, or nut-free versions.
- Flavor boosters: Incorporate espresso powder or different extracts for variety.
Common Mistakes to Avoid
Even seasoned home chefs can stumble into these traps when making snack bars. Keep yourself on track by avoiding these common pitfalls:
1. Overloading on Sweeteners
Natural sweeteners are better options than refined sugar, but too much can still be counterproductive. Stick to 2-3 tbsp of liquid sweetener per batch, keeping in mind that dried fruits also contribute sweetness.
2. Not Pressing Firmly Enough
This is the leading reason bars fall apart. Press down firmly with the bottom of a glass or measuring cup to ensure everything sticks together well.
3. Cutting Too Soon
Exercise patience! Allow bars to chill completely (at least 2 hours) so they can set properly. Cutting too soon leads to a crumbly mess.
4. Overcomplicating Recipes
You don’t need a million ingredients for a great bar. Start with simple recipes (like the 3-ingredient granola bars) before exploring more complex variations.
5. Poor Storage Practices
Leaving bars at room temperature can lead to spoilage. Always store in airtight containers and be sure to freeze extras if you're not consuming them soon.
In the first part of this deep dive, we’ve explored the foundations of nutritious snack bars, why making your own is beneficial, the essential ingredients needed, and practical methods and recipes to get you started. Stay tuned for the next part, where we’ll answer common questions and dive into more delicious recipes and tips tailored to your busy lifestyle.
Common Mistakes to Avoid
Even seasoned home chefs can stumble into these traps when making snack bars. Keep yourself on track by avoiding these common pitfalls:
1. Overloading on Sweeteners
Natural sweeteners are better options than refined sugar, but too much can still be counterproductive. Stick to 2-3 tablespoons of liquid sweetener per batch, keeping in mind that dried fruits also contribute sweetness. Balance is key!
2. Not Pressing Firmly Enough
This is the leading reason bars fall apart. Use the bottom of a glass or measuring cup to press down firmly. Ensuring a tight pack helps each bar maintain its shape and texture after cutting.
3. Cutting Too Soon
Exercise patience! Allow bars to chill completely (at least 2 hours) so they can set properly. Cutting too soon can lead to a crumbly mess that defeats the purpose of all your hard work.
4. Overcomplicating Recipes
You don’t need a million ingredients for a great bar. Start with simple recipes (like the 3-ingredient granola bars) before exploring more complex variations. Sometimes, less truly is more!
5. Poor Storage Practices
Leaving bars at room temperature can lead to spoilage. Always store in airtight containers to maintain freshness, and consider freezing extras if you’re not consuming them soon. Vacuum-sealed bags work wonders for longer storage if you’re making a large batch.
FAQs About Nutritious Homemade Snack Bars
How long do homemade snack bars last?
Properly stored in the refrigerator, most homemade bars last 1-2 weeks. In the freezer (wrapped individually), they’ll keep for 2-3 months. The key is using an airtight container to prevent moisture and freezer burn.
Can I make snack bars without nuts?
Absolutely! Try sunflower seed butter instead of nut butter, and replace nuts with extra seeds (pumpkin, sunflower, chia). The Carrot Cake Bliss Balls recipe above is a perfect option that is nut-free.
Are homemade bars really healthier than store-bought?
Generally, yes—when made with whole food ingredients. As experts explain, “They’re often made using oats, nuts, seeds, and dried fruit, which can improve heart health and blood sugar control.” You control the sugar content and avoid artificial additives common in commercial bars.
How can I make my bars higher in protein?
Add protein powder (1-2 scoops), extra nuts/seeds, or hemp hearts. For every ¼ cup of hemp hearts you add, you’ll increase your entire batch’s protein content by about 10 grams. It’s a simple way to amp up the nutritional value!
What’s the best binder for no-bake bars?
Dates are the gold standard—they contain natural pectin that helps everything stick together. If you don’t like dates, a combination of nut butter and honey or maple syrup works well too for those delicious, chewy bars.
Your Action Plan for Snack Success
Creating nutritious snack bars you can make ahead isn't just convenient—it's a game-changer for your health and sanity during busy days. You now have everything you need: an understanding of what makes a truly healthy bar, simple methods that work, delicious recipes to try, and pro tips to avoid common mistakes.
Immediate Action Step
This weekend, pick ONE recipe to start with. If you’re new to this, the 3-Ingredient Granola Bars are virtually foolproof. Make a batch, store them properly, and feel the difference when hunger strikes, knowing you have real food ready to go. Your future self—rushing between meetings or shuttling kids to activities—will thank you for taking this small step toward healthier, more convenient snacking.
More Recipes to Try
There are endless possibilities for nutritious snack bars, so don’t hesitate to experiment with flavors and ingredients that suit your taste and dietary needs. Here are a few suggestions:
6. Chocolate Chip Energy Bites
- 1 cup oats
- ½ cup nut/seed butter
- ¼ cup honey or agave syrup
- ¼ cup dark chocolate chips
Mix ingredients, roll into balls, and refrigerate for a quick chocolatey bite. Perfect for curbing cravings!
7. Trail Mix Bars
- 1 cup rolled oats
- ½ cup nuts (your choice)
- ¼ cup dried fruit
- 2 tablespoons nut butter
- 2 tablespoons honey
Follow the no-bake method to create a chewy, protein-packed bar that’s great for hiking or road trips.
8. Cinnamon Almond Cereal Bars
- 2 cups almond flour
- 1 cup rolled oats
- ½ cup honey
- 1 teaspoon cinnamon
Bake these at 350°F for 20 minutes for a delicious cereal bar that feels indulgent but is healthy and nutritious!
Inspiration and Tips for Staying Motivated
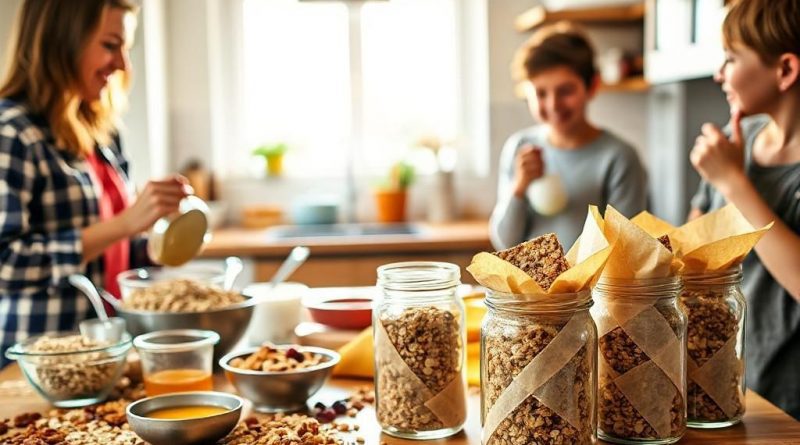
As you embark on your snack-making journey, remember that the goal is not perfection but consistency. Set aside time each week for meal prep, and consider making your bars a family activity. Involve the kids—let them help mix ingredients and choose their favorite add-ins. Not only does this make for fun family bonding, but it also helps them learn about nutrition and healthy eating habits.
You can even switch themes according to the season or upcoming holidays—pumpkin spice in the fall or peppermint for winter holidays can add a festive touch to your snack bars. Flexibility and creativity are the names of the game!
Staying Social with Snack Bars
Don't hesitate to share your creations! Take photos of your snack bars and tag friends who might appreciate them. Join local or online groups that focus on healthy eating or meal prep for inspiration and support. Exchange recipes and swap snack ideas to keep the momentum going.
Ultimately, nutritious homemade snack bars are not just meals; they are tools that empower you to take control of your health and nutrition on busy days. By preparing ahead, you simplify your life and nourish your body with wholesome ingredients that truly satisfy.
With a little practice, you’ll be whipping up delicious snack bars that delight your taste buds while fueling your active lifestyle. Now, let’s get those ingredients ready and start creating!